
If you’re planning a trip to Capitol Reef National Park and want to get truly off the beaten path, the Halls Creek Narrows hike needs to be on your adventure list. This remote slot canyon in the park’s southern reaches offers one of the most dramatic canyon experiences in all of Utah — and most people have never heard of it. It’s been on my bucket list for years and last weekend, I finally made it a priority.
Spoiler alert: if you like scrambling down canyons, route-finding, and deep canyons with water resembling Escalante or Zion’s famous Narrows hike, you won’t want to skip this. Best part? No crowds — not even for a national park in Utah + free permits.
This guide covers the full picture: trail stats, permit info, route descriptions, what to expect in the water, and honest gear recommendations based on my recent trip. We took an unmarked shortcut trail down instead of starting from the traditional Halls Creek Overlook and if you’re comfortable with class 2-3 scrambling, cliffs, and steep drop offs, this is for you. If that part makes you uncomfortable, the traditional trailhead connects with this one in about 4.5 miles.
Many other websites list different trail stats, but mine are based on my actual GPX track from Gaia — which you can download for free here.
Quick Stats: Backpacking Halls Creek Narrows:
HIKE TO: Halls Creek Narrows
TRAILHEAD: Halls Creek Unmarked (see below)
MILES: 17.84 mi
NARROWS LOOP: 8.6 mi
TIME: 1 night (7:07 hours moving time)
DATE I WENT:  4/6/26 - 4/7/26
BEST TIME: Spring and Fall
DIFFICULTY: moderate-strenuous
ELEVATION GAIN/ LOSS CUMULATIVE: 3,513 ft total
ELEVATION GAIN/ LOSS NET: 1,093 ft total
HIKE PERMIT: yes for overnight campers
ENTRANCE FEE/ PARKING: yes - purchase your park pass here
LOCATION: Capitol Reef National Park near Hanksville, Utah
New to backpacking or want to make sure you’re packing smart?
Check out my Beginners Backpacking Guide and Tiff’s Personal Backpacking List before you head out.
What Is Halls Creek Narrows?
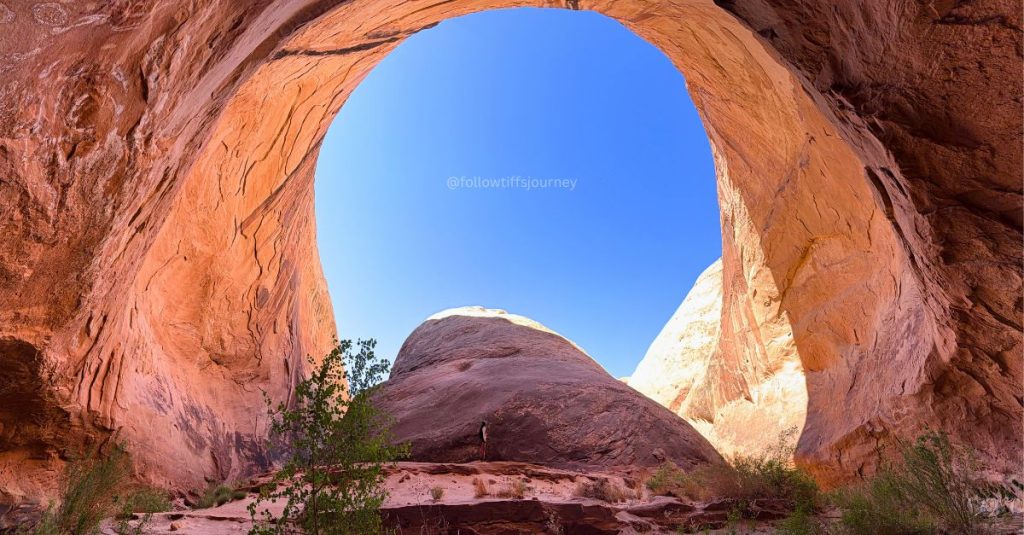
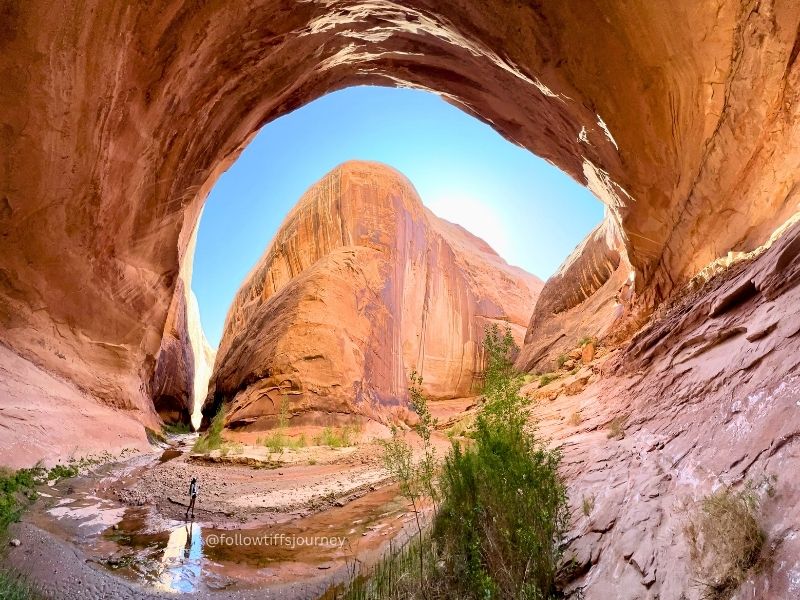
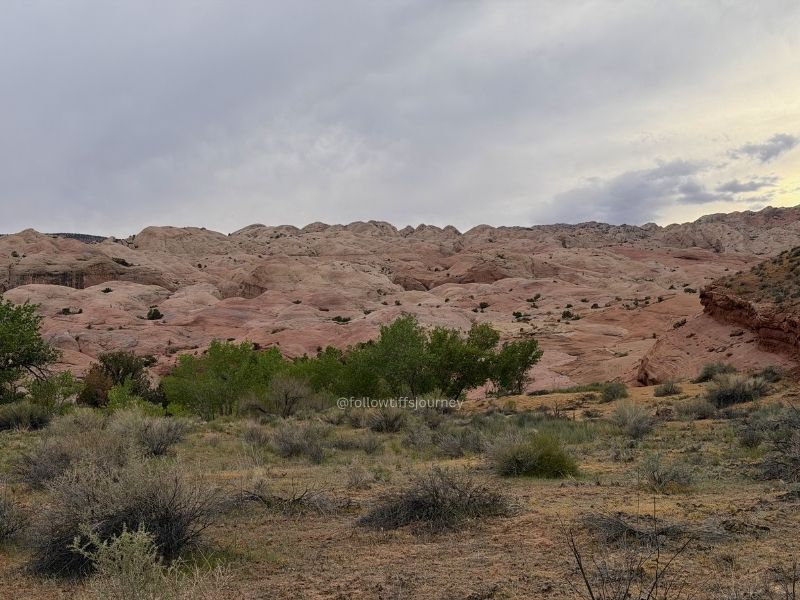
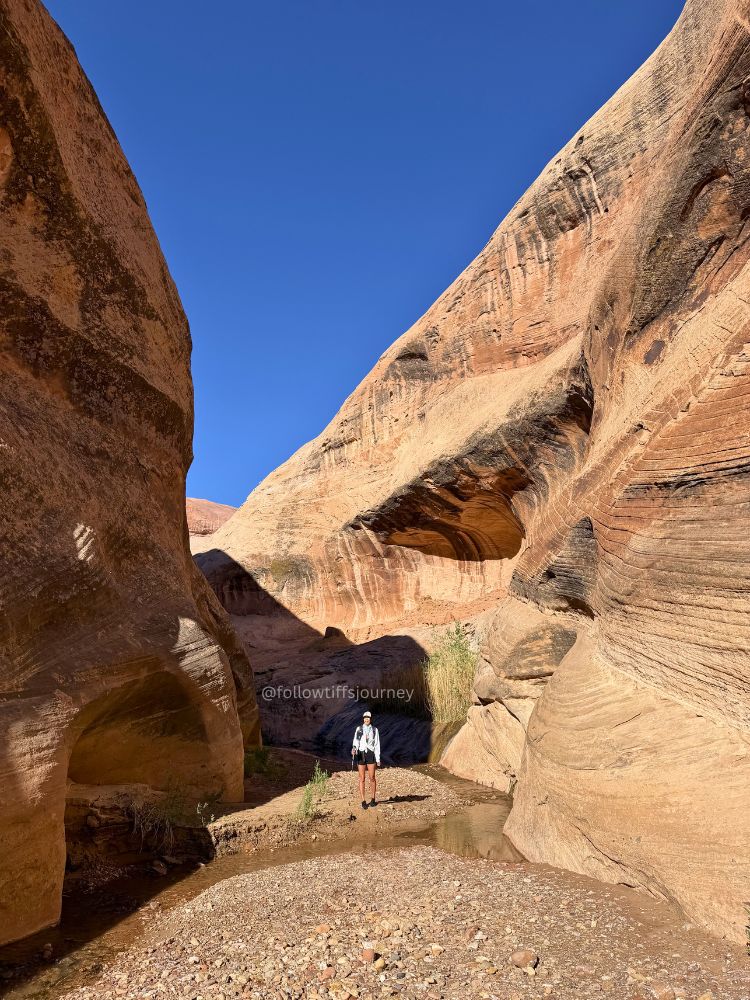
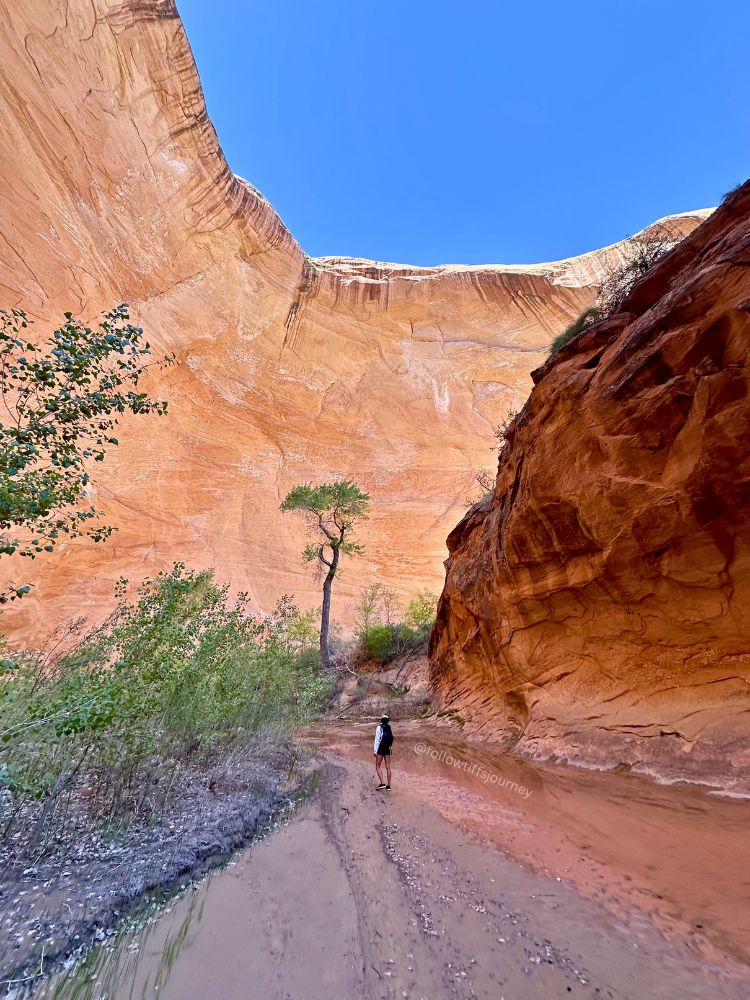
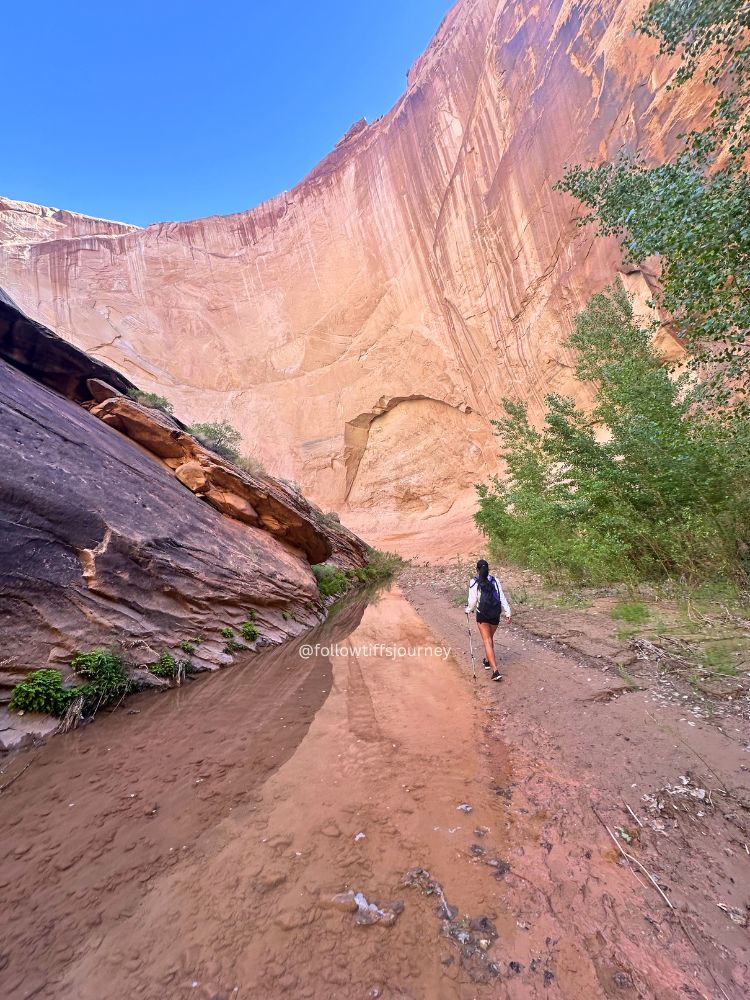
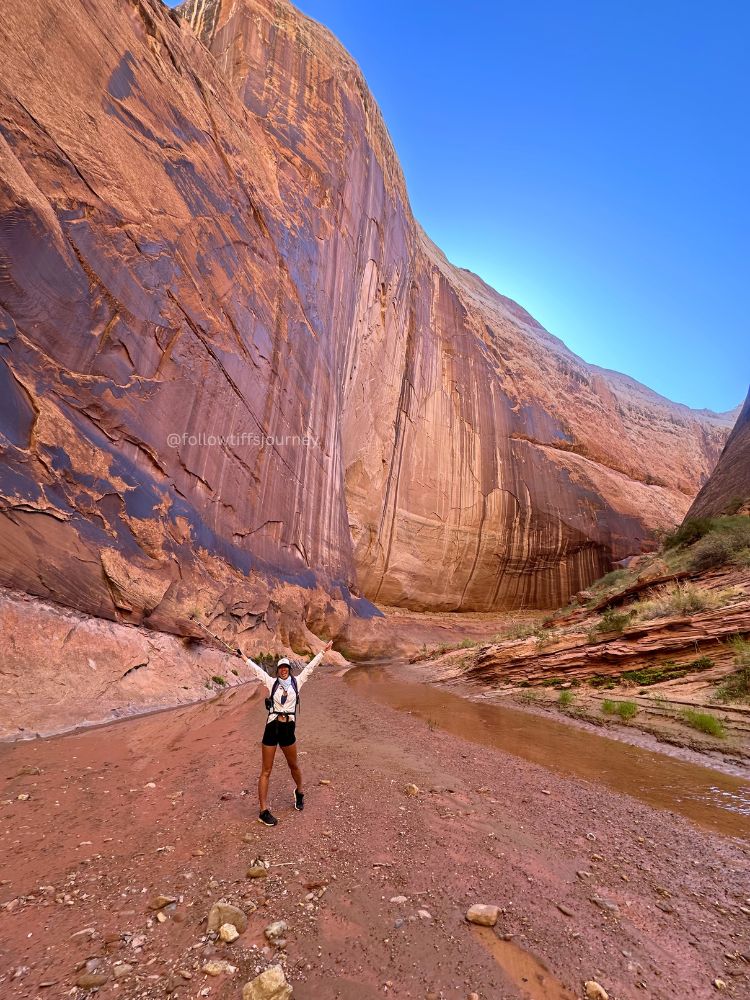
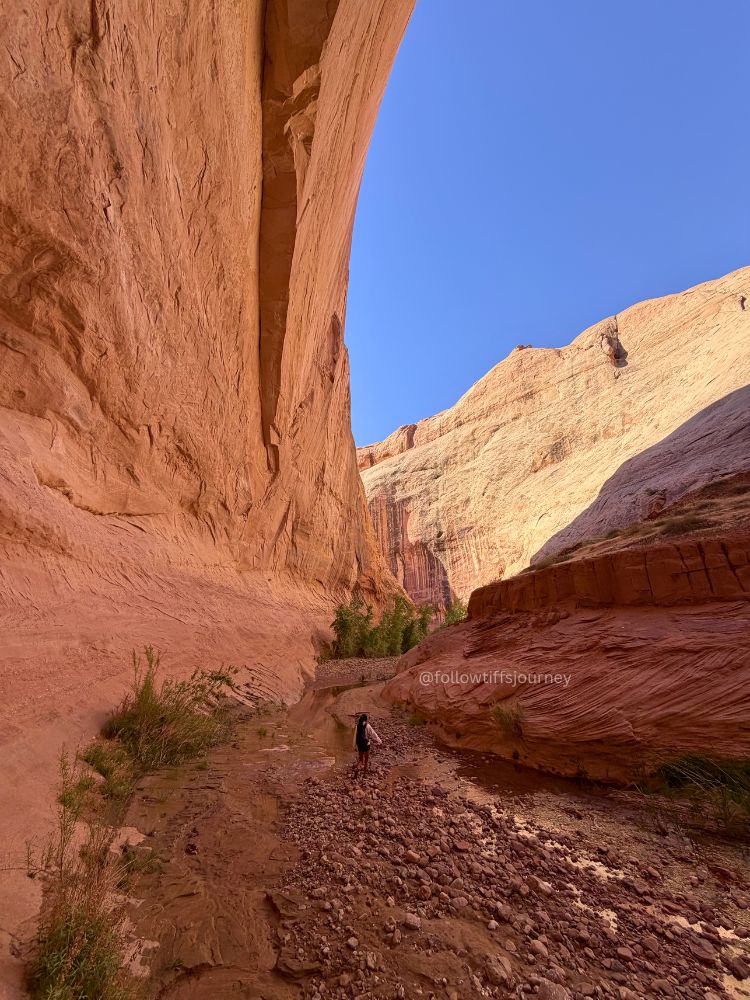
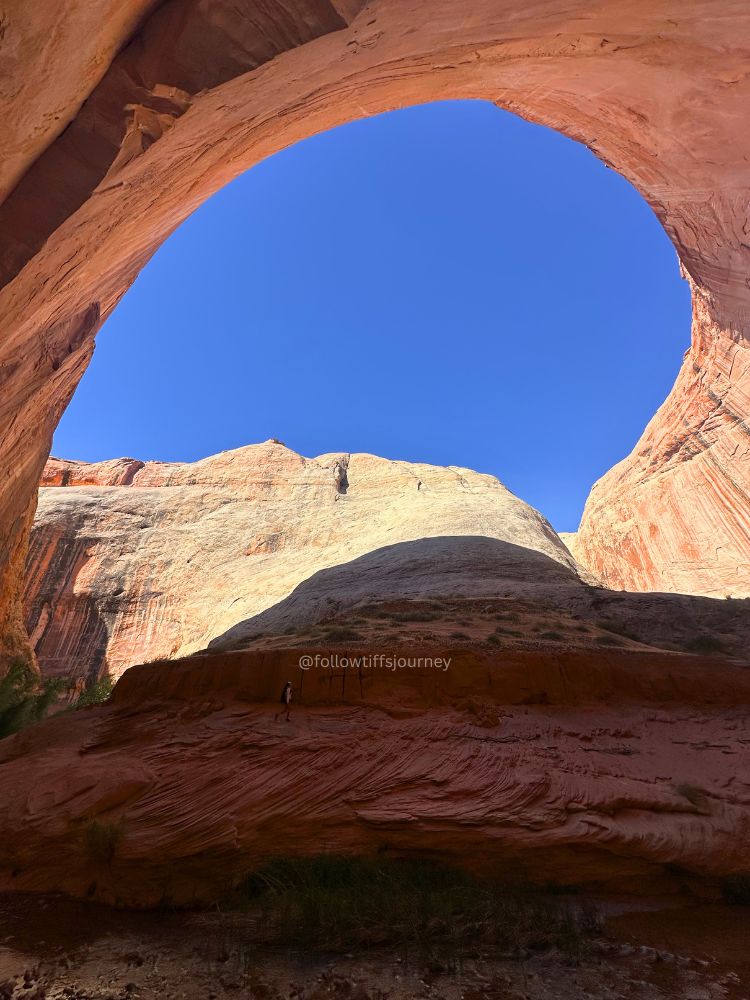
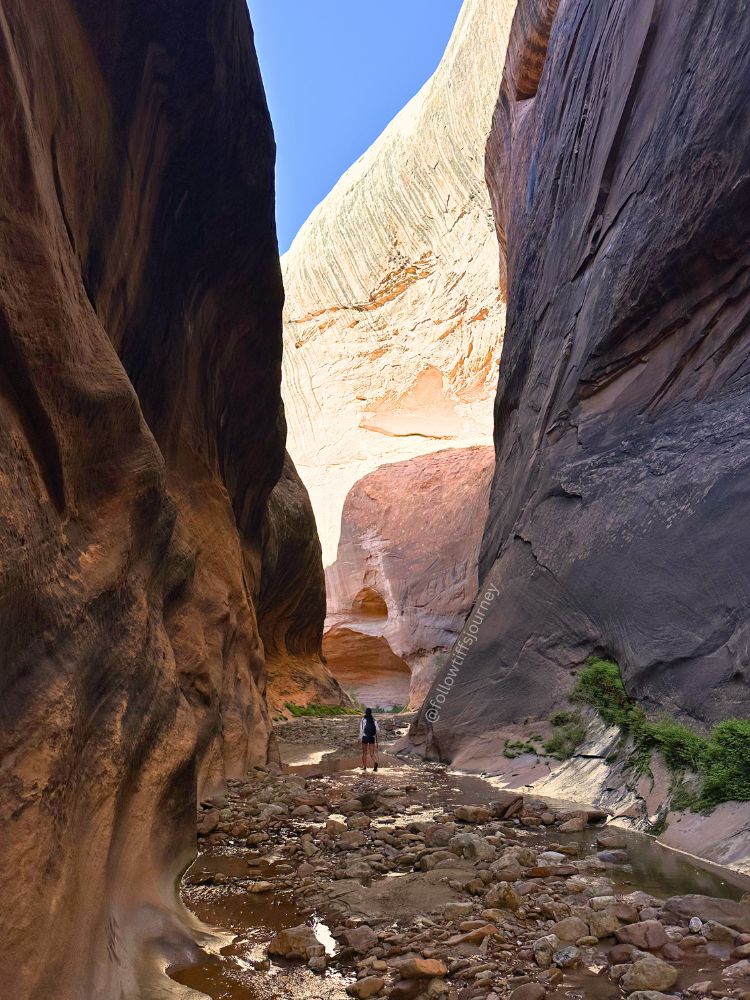
Halls Creek Narrows is a slot canyon carved into the Navajo Sandstone at the bottom of the Waterpocket Fold — the dramatic geologic feature that defines Capitol Reef National Park. The canyon walls tower up to 1,200 feet above you in places, and the whole thing is fed by a year-round stream, meaning you’re going to get wet — and it can get deep depending on the time of year you go.
If you know the Southwest US desert gems well, think of it as a hybrid of Escalante’s famed (and now overcrowded) Coyote Gulch and Zion’s even more popular Narrows hike. But definitely more the first.
What makes this place special, beyond the sheer scale of the canyon, is how remote it is. It sits at the extreme southern tip of Capitol Reef, far from the Fruita area most tourists never leave. There’s no shuttle. No paved road all the way. No developed trail. No crowds. Just you, the canyon, and a lot of red and white sandstone.
Most people do this as a 2–3 day backpacking trip. My friend and I did it in less than 24 hours with one night camping in the canyon — while moving at a leisurely pace — though in full transparency, we’re probably faster than the average hiker that comes through a national park. This is one of those places that rewards you for slowing down, and you’ll want to pull your camera out around every corner.
If you’re a slot canyon obsessive like me, check out my full roundup of slot canyons worth visiting in the American Southwest for more like this.
Booking travel soon?
Please consider using my affiliate links below. It costs nothing additional for you but helps me maintain the ever-increasing costs of running a travel blog:
General travel through Tripadvisor here.
Book your flights here.
Book your accommodations here on Expedia, Booking.com, Hotels.com, and VRBO.
Book your car rentals here.
Book your tours here.
Book your travel insurance here.
Shop my favorite gear here.
Is Halls Creek Narrows Worth It?
Yes — with one caveat: you have to go in prepared for the logistics.
The canyon itself is stunning in a way that’s hard to overstate. Think Coyote Gulch energy but with almost no one else around. The approach is long, the drive is rough, and the route-finding is real — but all of that is exactly what keeps this place uncrowded and gives it a true sense of adventure.
But if you’re an intermediate-to-advanced hiker who’s done multi-day desert backpacking before and loves having a canyon basically to yourself? You’re going to love every minute of it.
Halls Creek Narrows Permit Info
A free backcountry permit is required for any overnight trip. Pick one up at the Capitol Reef Visitor Center, which is about 1.5 hours from the trailhead.
No permit reservation system is available online, no fees. Just show up and grab one before you hit the trail.
How to Get to the Trailhead
Getting there is genuinely half the adventure. The Halls Creek Narrows Trailhead sits at the southern end of Capitol Reef National Park, and no matter which direction you’re coming from, it’s a 2-3 hr haul.
From the Capitol Reef Visitor Center, the easiest and fastest route with the move paved road driving goes around Hanksville and is roughly 116 miles — about 2 hours of driving. While it’s longer mileage than the other options, it’s the least amount of miles on dirt roads.
Pro Tip: If you’re driving through Hanksville, stop by Stans for a burger and shake!

The unpaved sections are typically hard-packed and passable to regular passenger vehicles, except for the last 4 miles. That final stretch is rough and requires a 4WD vehicle and high clearance for 1-2 small obstables—the kind of terrain that made us get out of the vehicle to see if we could clear it in my Bronco Sport Badlands with Sasquatch Package. We did fine going slowly.
Traditional Halls Creek Overlook Trailhead: map
Our Unmarked Shortcut Trailhead: 37.67725, -110.91455
Route Options: Traditional vs. Shortcut
Option 1: Traditional Route
The classic approach: descend from the Halls Creek Overlook, follow the creek drainage south to the narrows entrance, complete the narrows loop, and hike back out the way you came. Usually done as a 2–3 day trip.
I haven’t personally done the traditional route, so I’ll keep this brief rather than speaking to something I haven’t experienced firsthand. The descent from the overlook is an 800-foot drop — easy going in, something you’ll definitely notice on the way back out. Once you’re in the Halls Creek drainage, navigation heads south and is fairly straightforward, though the trail braids in places. This trail will connect with the main trail of my trip report below in roughly 4-5 miles. Download your route to Gaia GPS before you leave — don’t rely on cairns.
Reliable water sources include the Fountain Tanks at around 4.4 miles from the trailhead (look for a cluster of pools on the east side of the gulch), and Halls Creek itself once you’re in the drainage (I share more on this below).
Option 2: The Unofficial Shortcut Route (Recommended for Experienced Hikers)
This is the route I did, and it was a blast — but it’s absolutely not for everyone.
I read about it on another blog while planning my trip and it supposedly cuts the overall distance down significantly — though my Gaia track ended up longer than what that blog described, so take published mileage with a grain of salt and download the GPX file here.
The catch: it involves a fairly sketchy scramble down into the canyon via the Waterpocket Fold, with some real route-finding required. We’re talking no obvious trail, exposure on the descent, and a lot of “is this the right way down?” moments.
For me, that was half the fun. But if technical scrambling in an unfamiliar desert canyon makes you nervous, stick with the traditional route.
We started hiking down in the early evening, covered almost 5 miles, and set up camp right at the narrows junction just before sunset. Perfect timing. The next morning we hiked the full narrows loop, arriving back at camp at 12:45pm, and back to the car at 3:30 pm..
Halls Creek Narrows Hike Description
Day 1: Hiking to the Narrows Junction
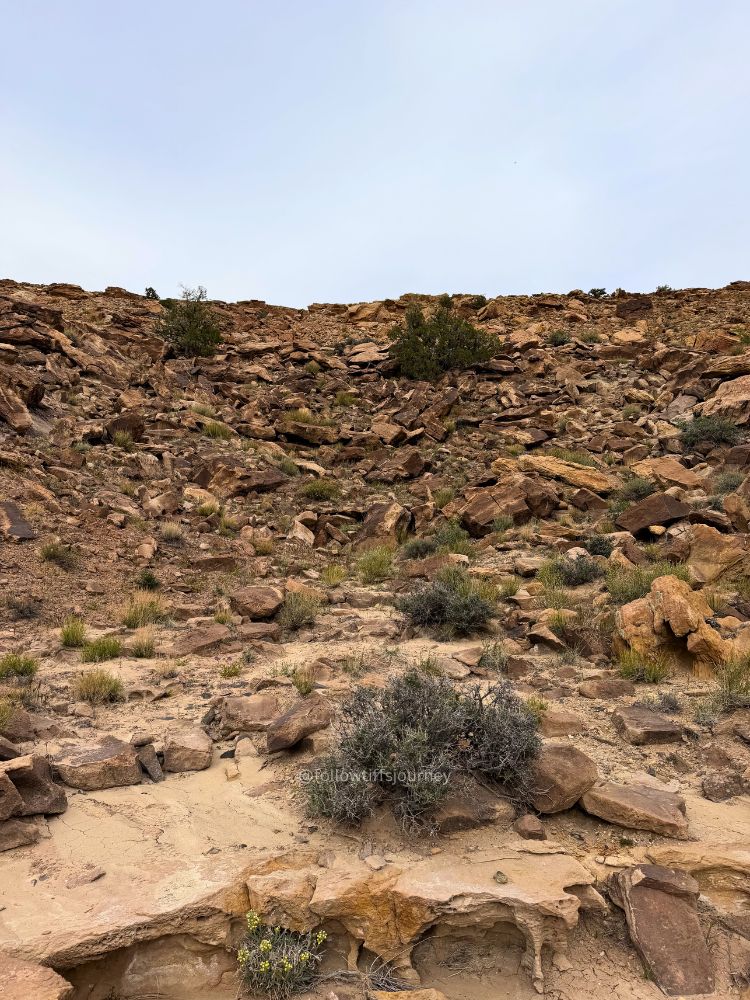
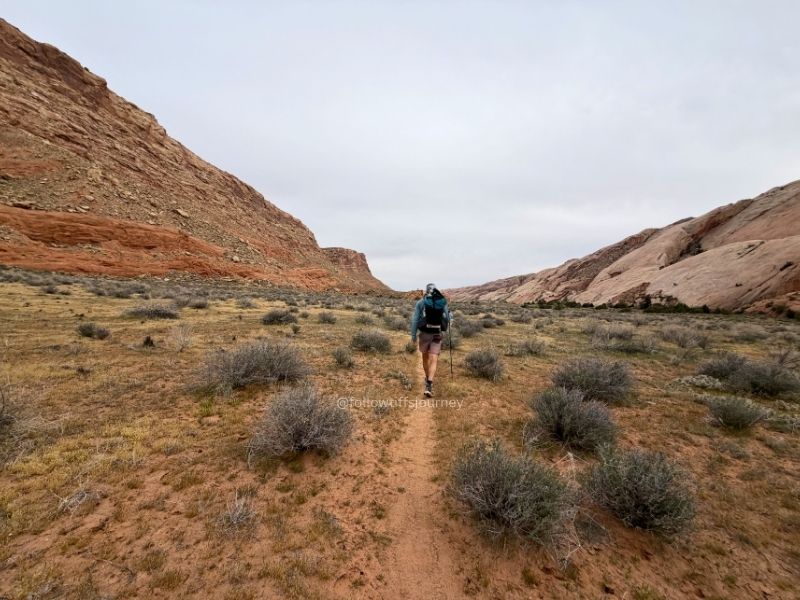
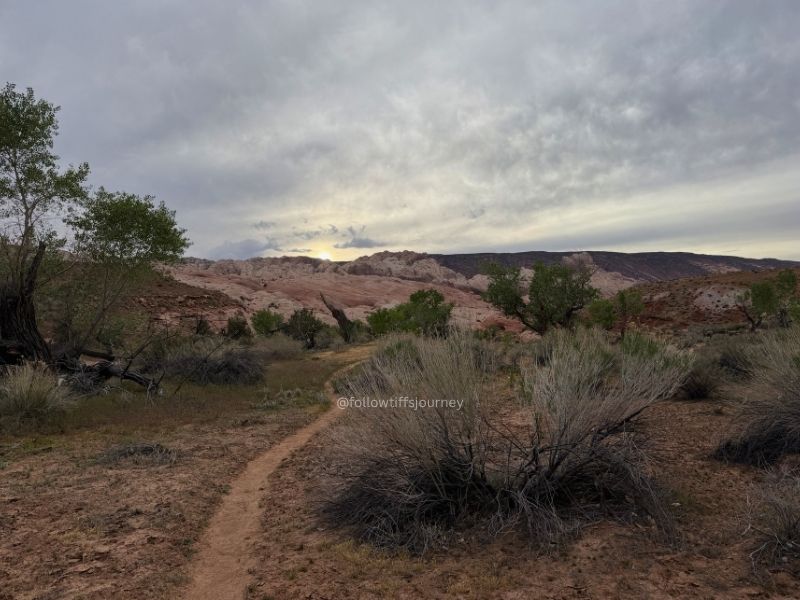
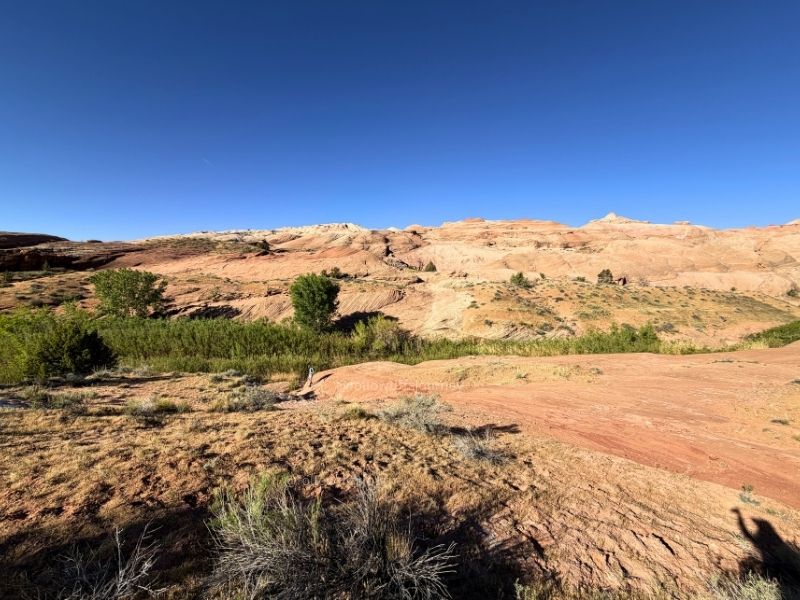
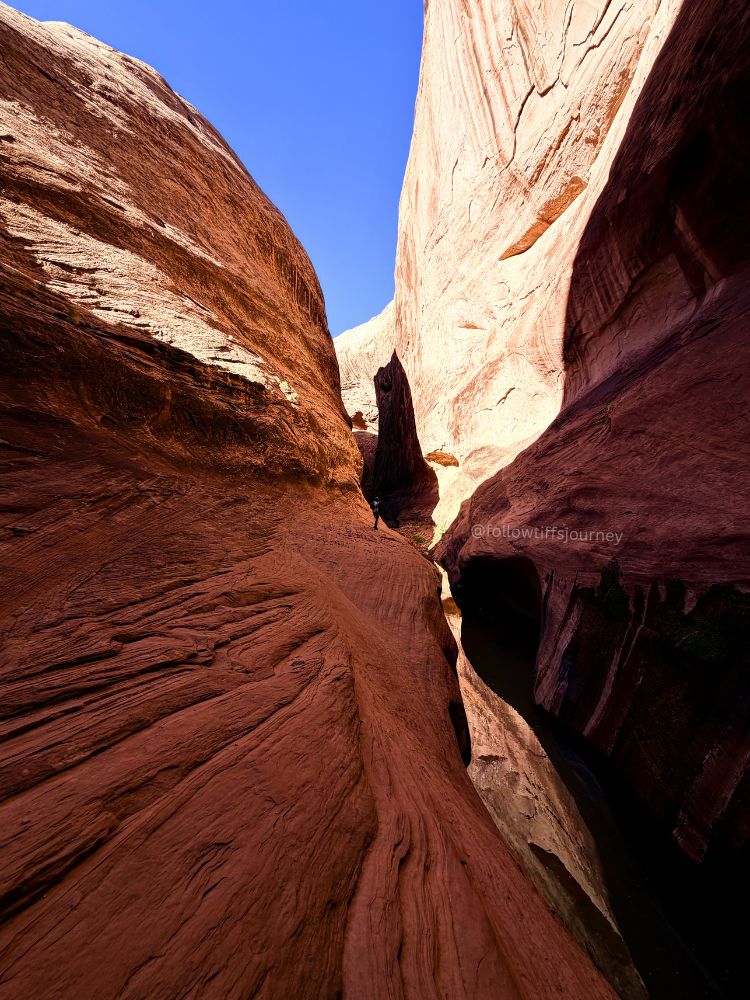
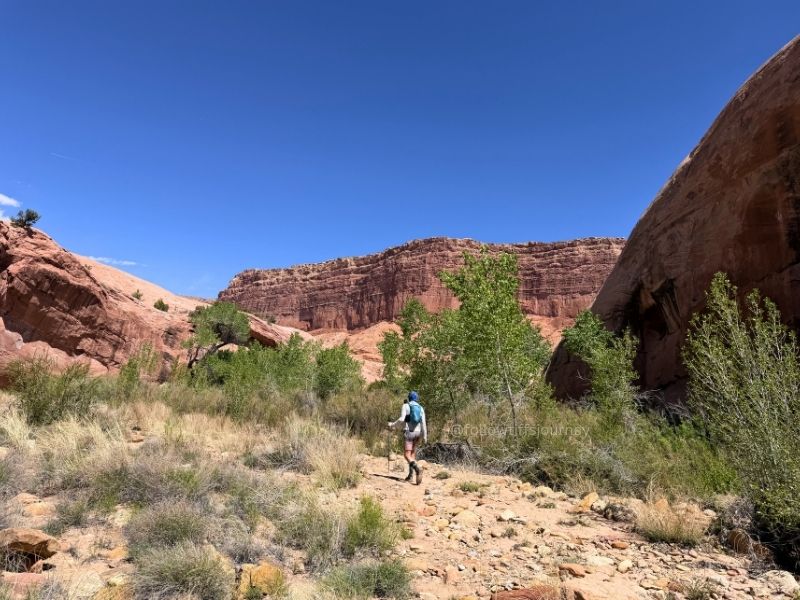
We started our hike on April 6th at 5:21 pm. The first section was just navigating down a non-technical gully. There’s no designated trail, so you need to know how to route find.
The hike looks like it drops off the canyon cliffs shortly in front of you, but it doesn’t — it does get more technical with scrambling though. You’ll need to be comfortable with class 2-3 scrambling to get down and connect with the official trail.
Always look ahead to see where you’re going next. The trail trends to hiker’s left, and you’ll usually be able to spot a used dirt path, but we went straight down until we cliffed out, then spotted the trail to the left and made our way all the way down. Make sure you test rocks before pulling and trusting your weight on them.
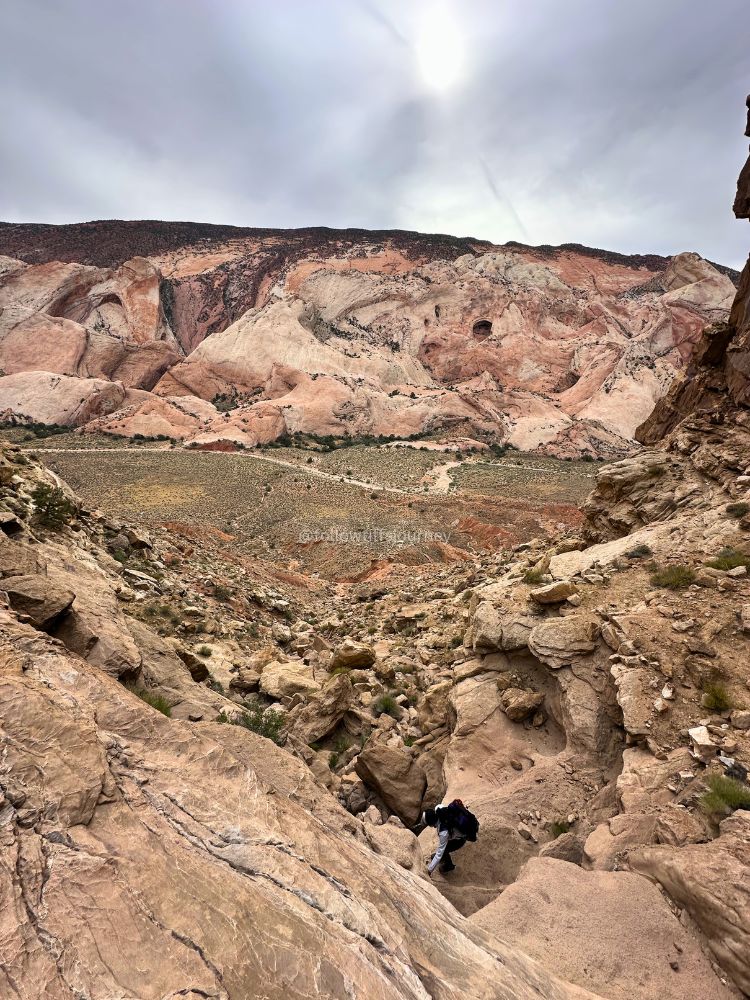
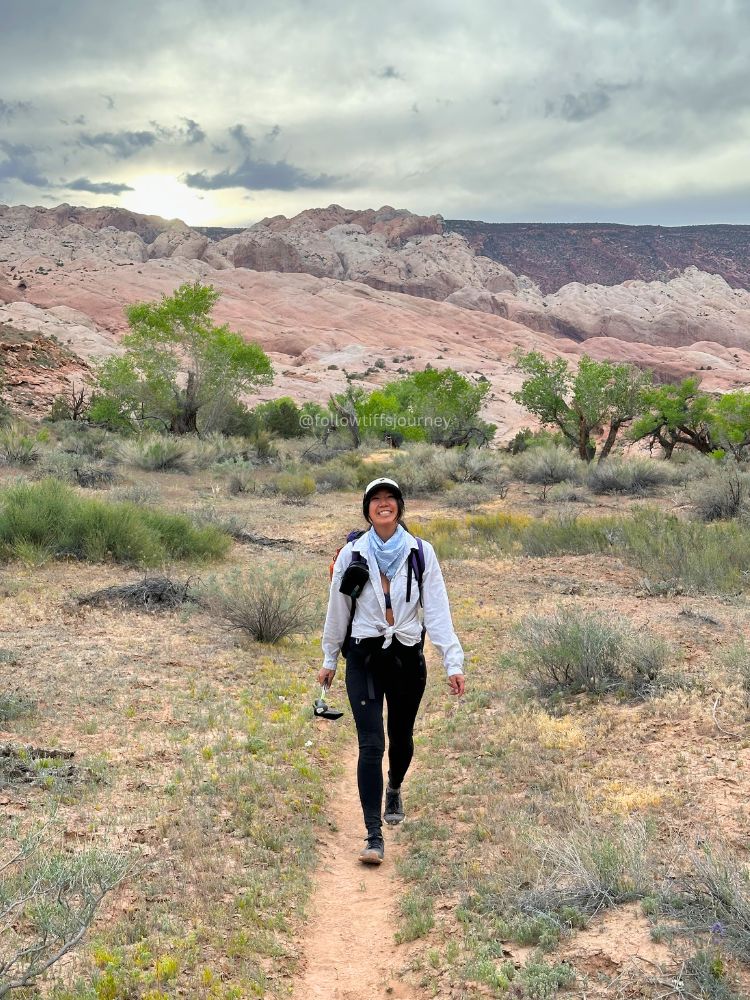
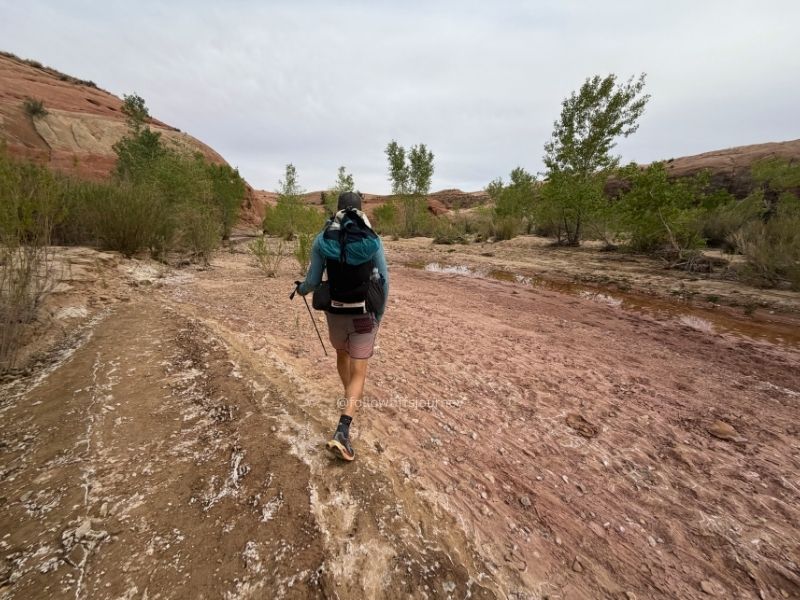
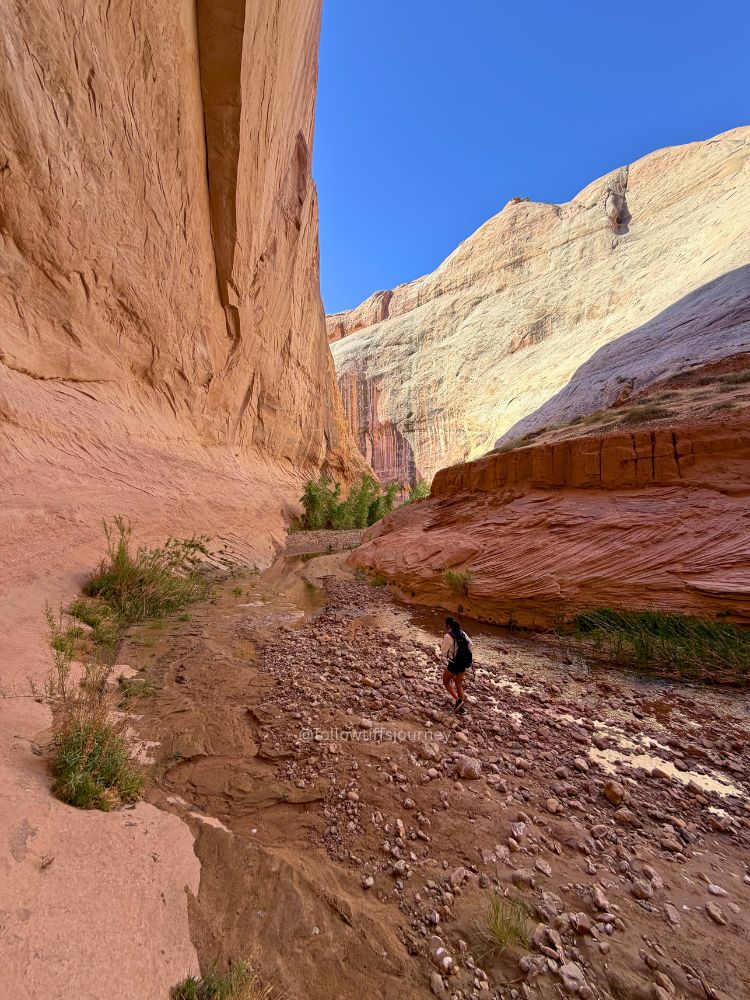
We reached the flat trail at the bottom at 5:49 pm — that first section is 0.4 miles with a 691-foot descent. From here, the trail all the way to the narrows junction is relatively flat, easy, and sandy.
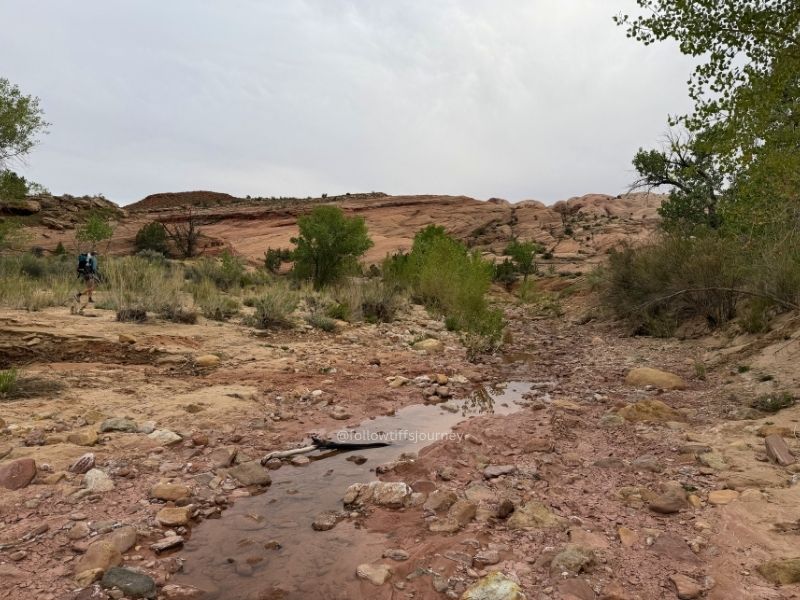
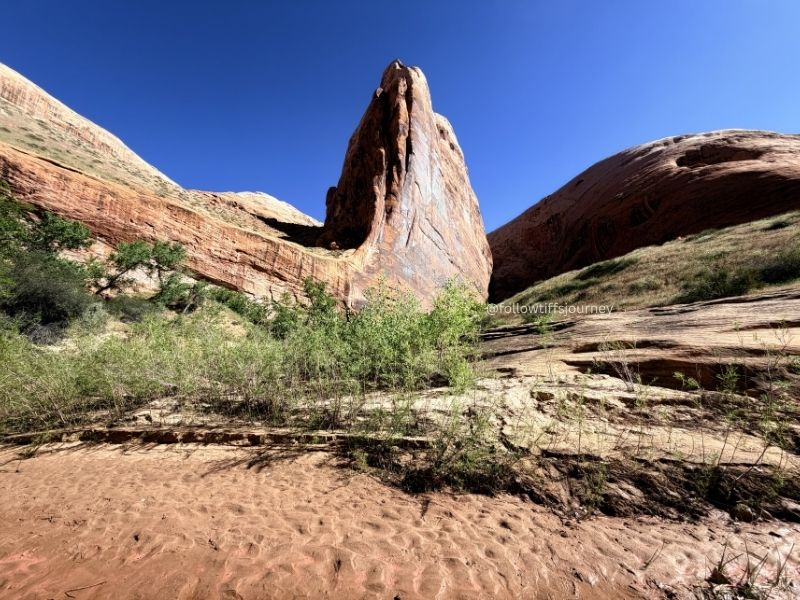
The trail is usually clear but crosses through the dry wash a few times, so look for the connecting trail on the opposite side. The hike is very exposed with no shade, and I’d avoid it mid-day on a warm summer day — it was getting toasty even on our hike out in the afternoon, though we were grateful for a lot of cloud coverage. This is when a sun hoodie comes in very handy and here’s 10% off my favorite one.
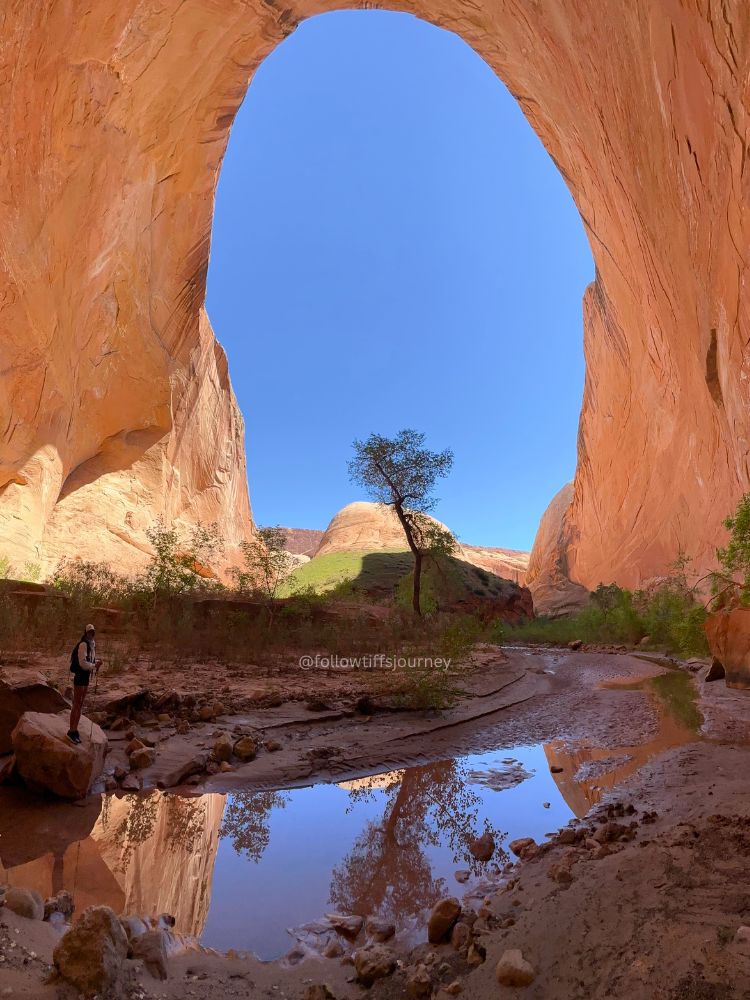
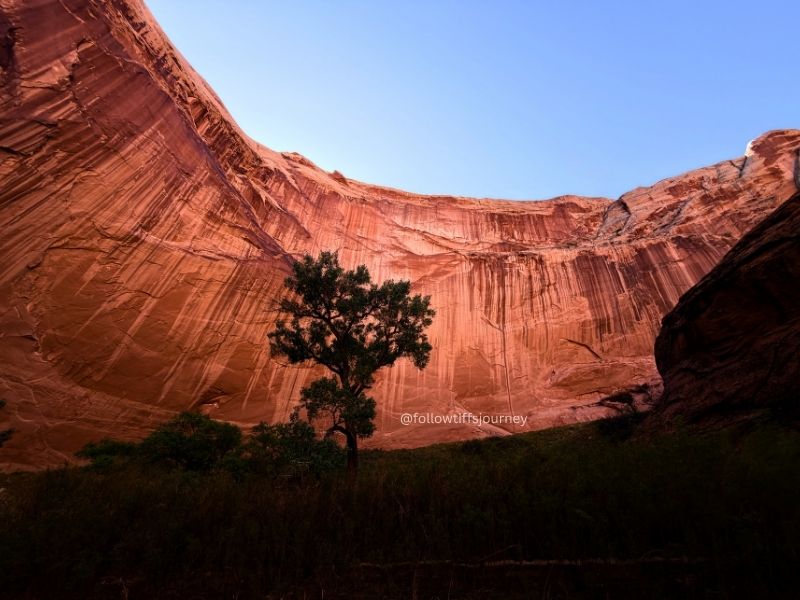
There are cottonwood trees along much of the trail where you can seek a tiny bit of shade if needed, and plenty of cacti, so be mindful of your steps. The wildflowers were also blooming on our trip!
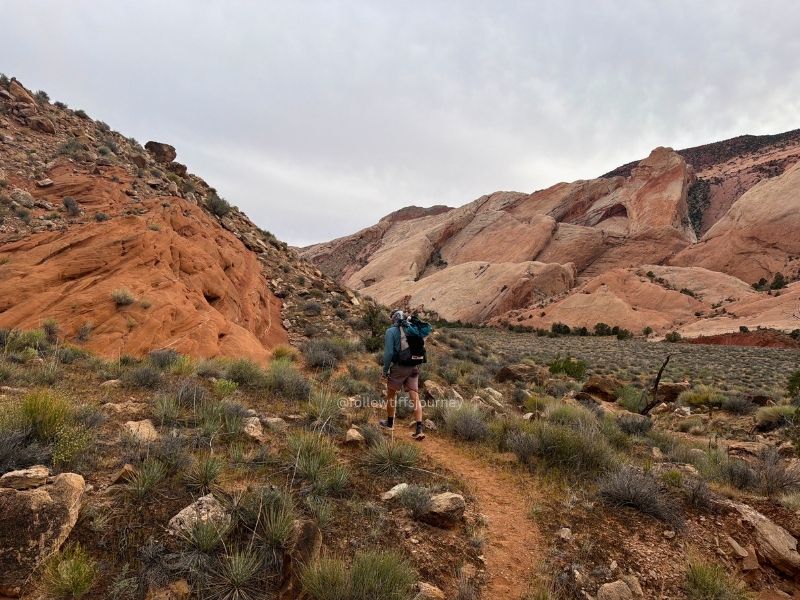

We made good time and reached the narrows junction at 7:06 pm — 4.5 miles and 1:45 hrs from the trailhead, with the light still out. That flat section is 4.1 miles with 216 feet of elevation loss. We only passed one group of campers along the way and didn’t see another soul the entire time out there, which is what makes this place feel so special.
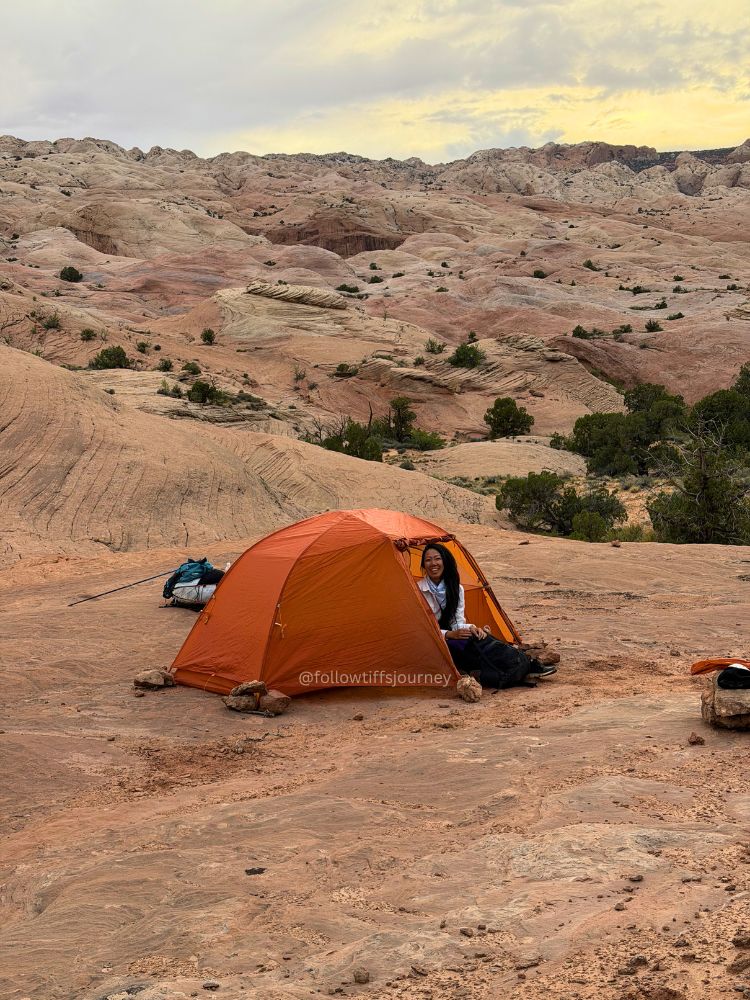
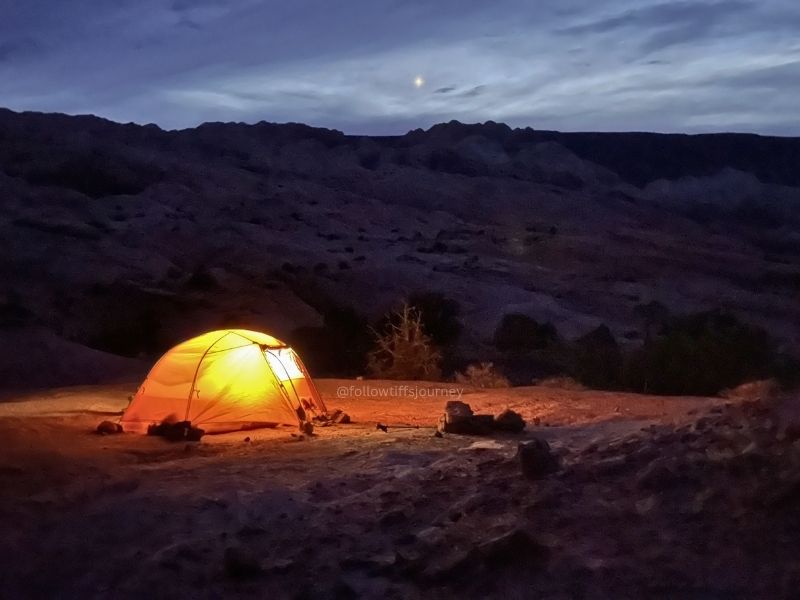
The bugs started coming out and we didn’t want to camp in the sand, so we found a flat spot on the rocks to set up camp — there aren’t many flat-ish options on the rock out there, so scout around a bit.
After setting up my new Big Agnes Copper Spur ultralight tent (which I’m now completely obsessed with), we had a simple dinner and went to bed early. I’d been driving for 8 hours to get here from Alstrom Point that same morning so I was a bit exhausted and fell asleep right away.
Day 2: Hiking the Narrows in Capitol Reef
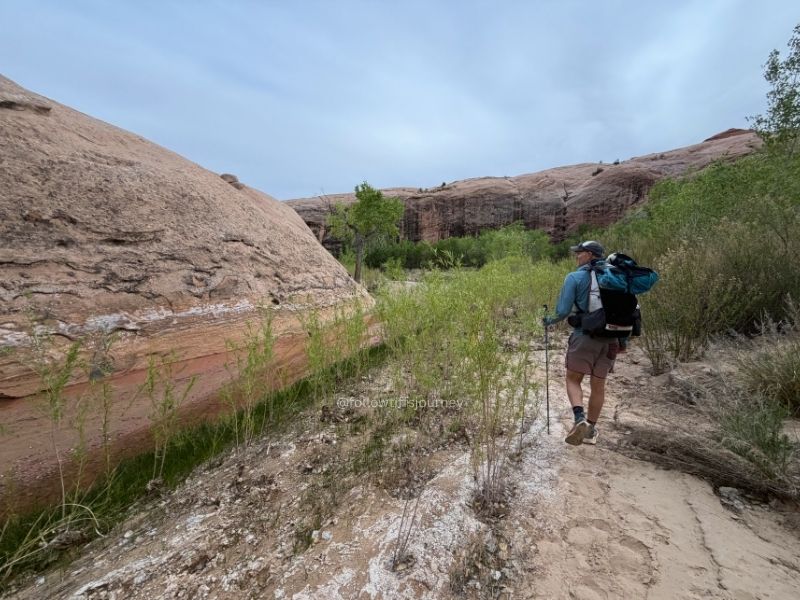
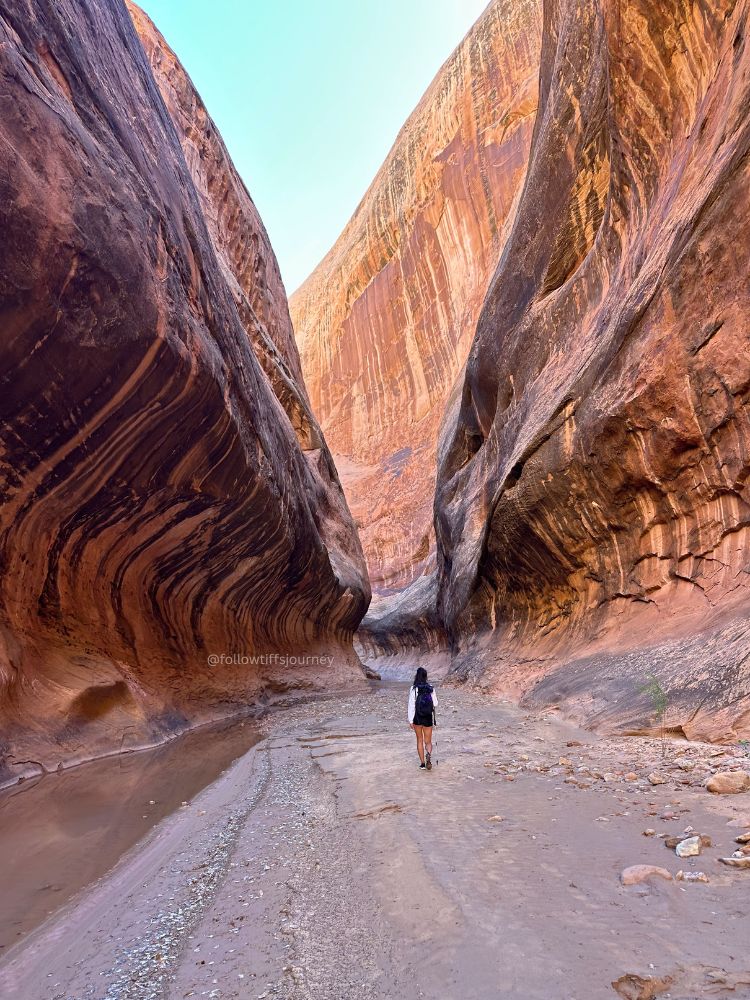
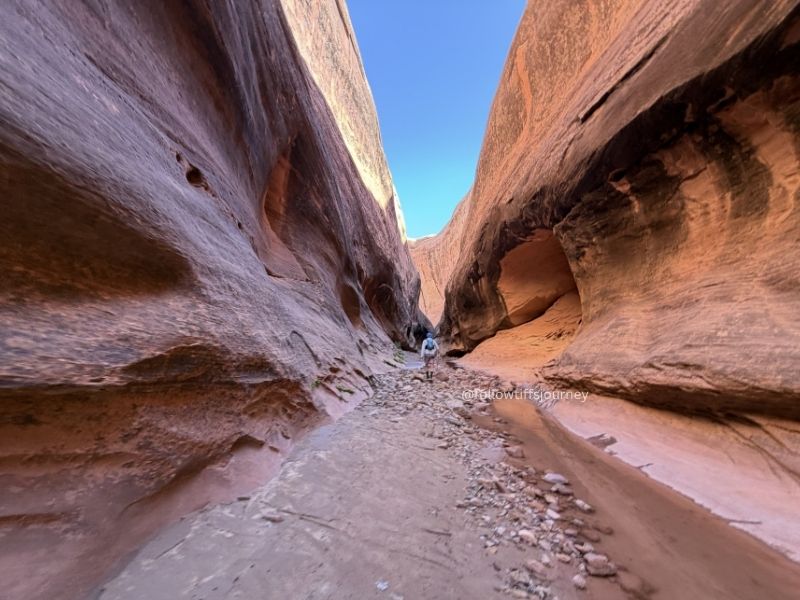
After fueling up with my favorite granola for a leisurely breakfast, we started hiking toward the slot canyon at 8:30 am. The Narrows really do remind me of Coyote Gulch in Escalante — but without the crowds.
The trail leading to the canyon and creek is very clear to spot. We turned off from the trail 1.75 miles from camp (6.25 miles from the trailhead) and headed straight toward the canyon to hiker’s right. You won’t see an official entrance, but just make your way into the creek and consider that the start of the narrows section.
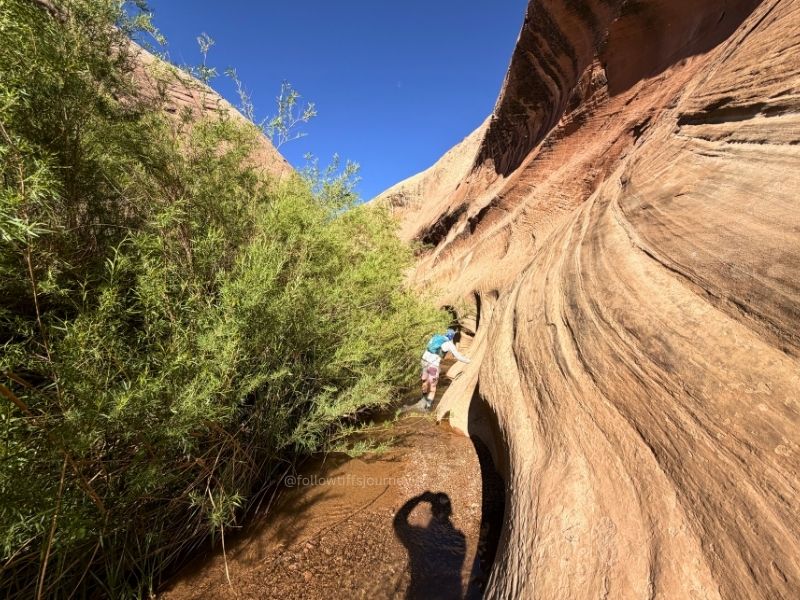
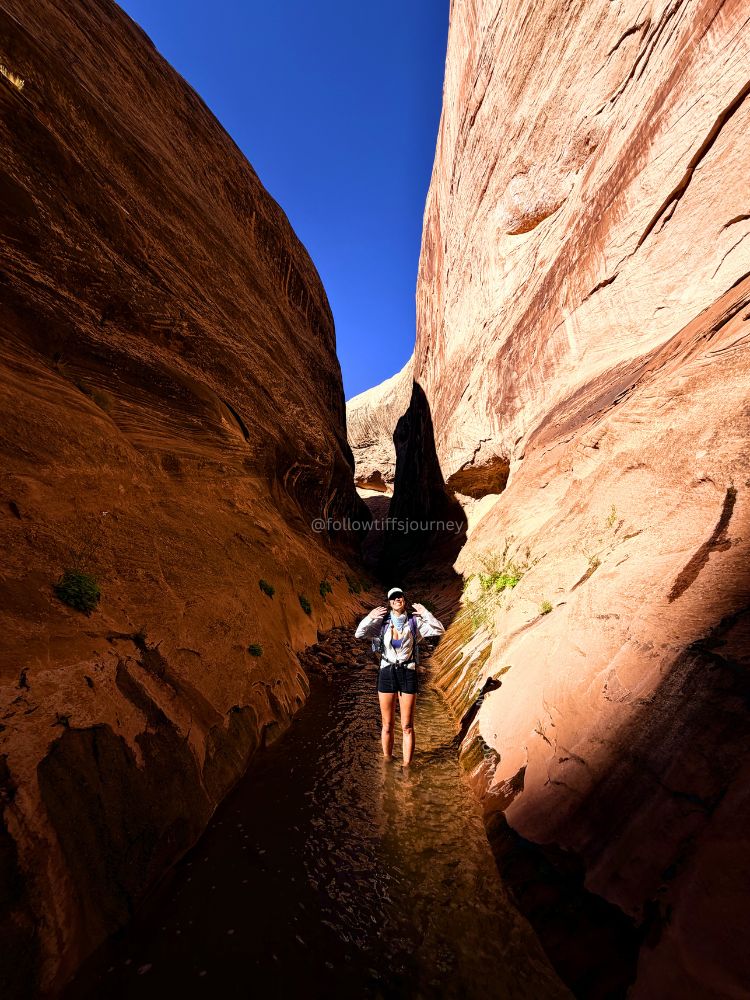
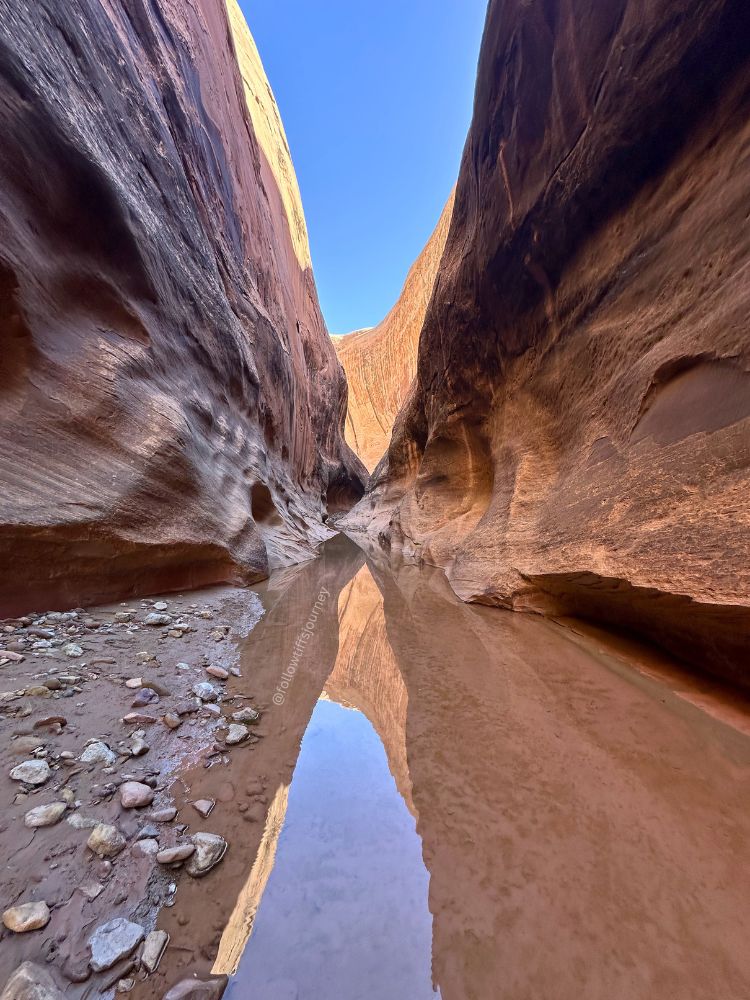
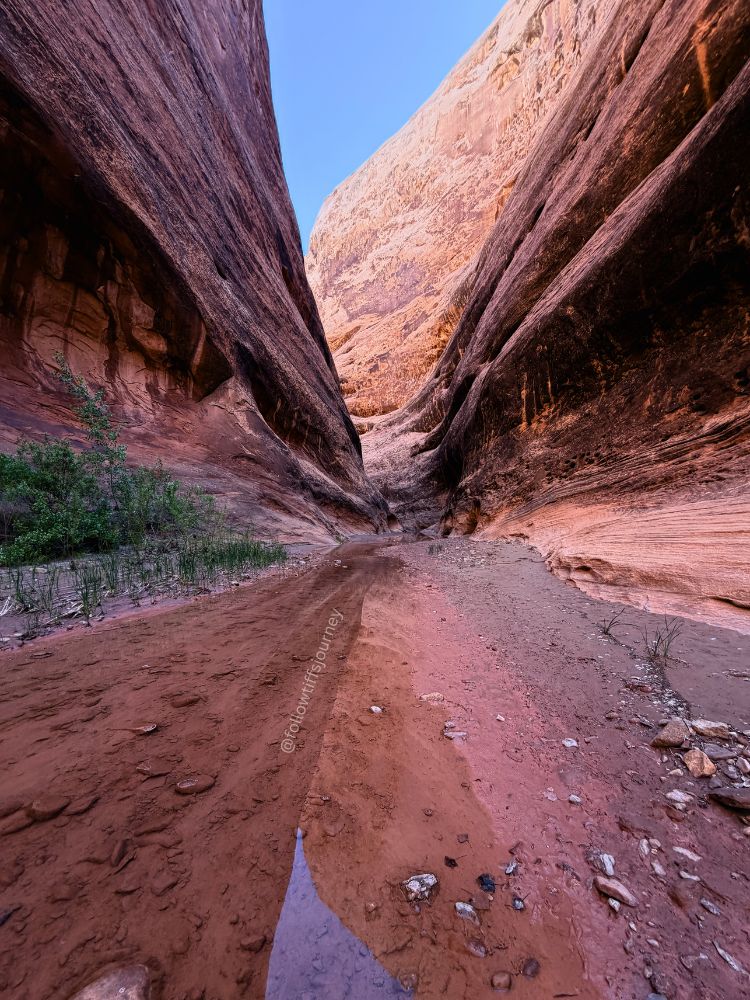
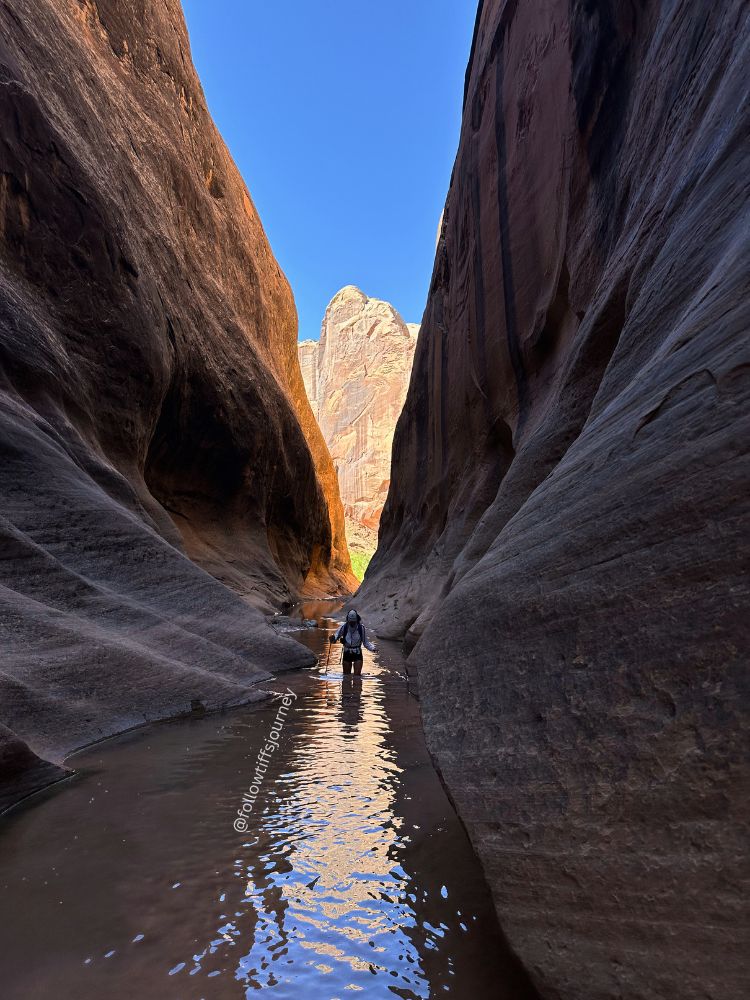
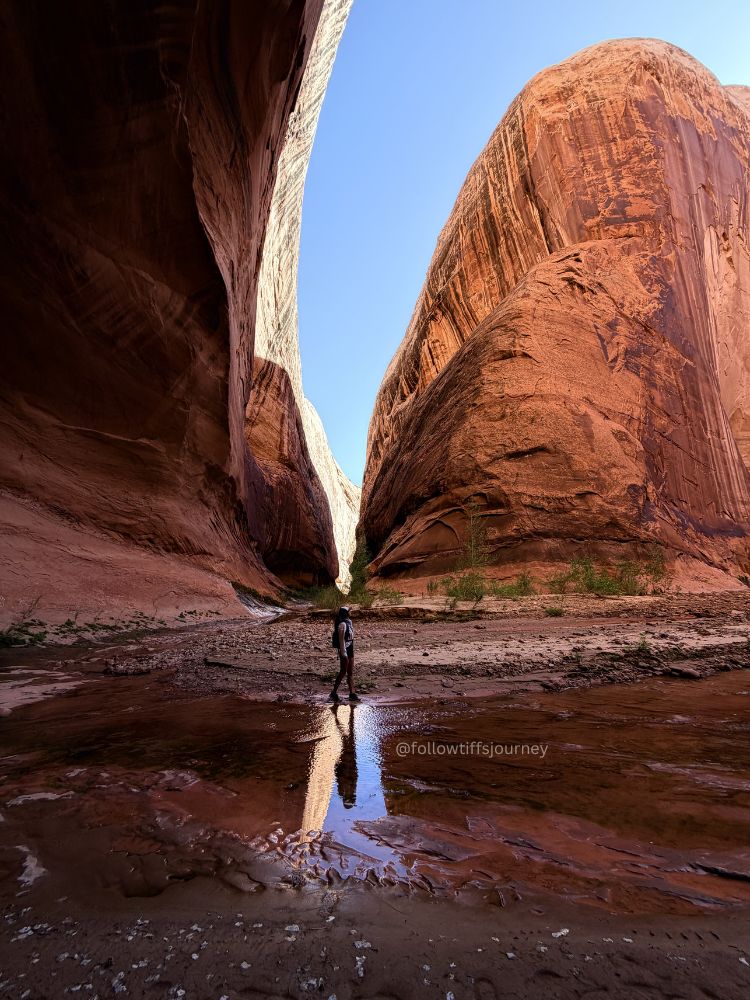
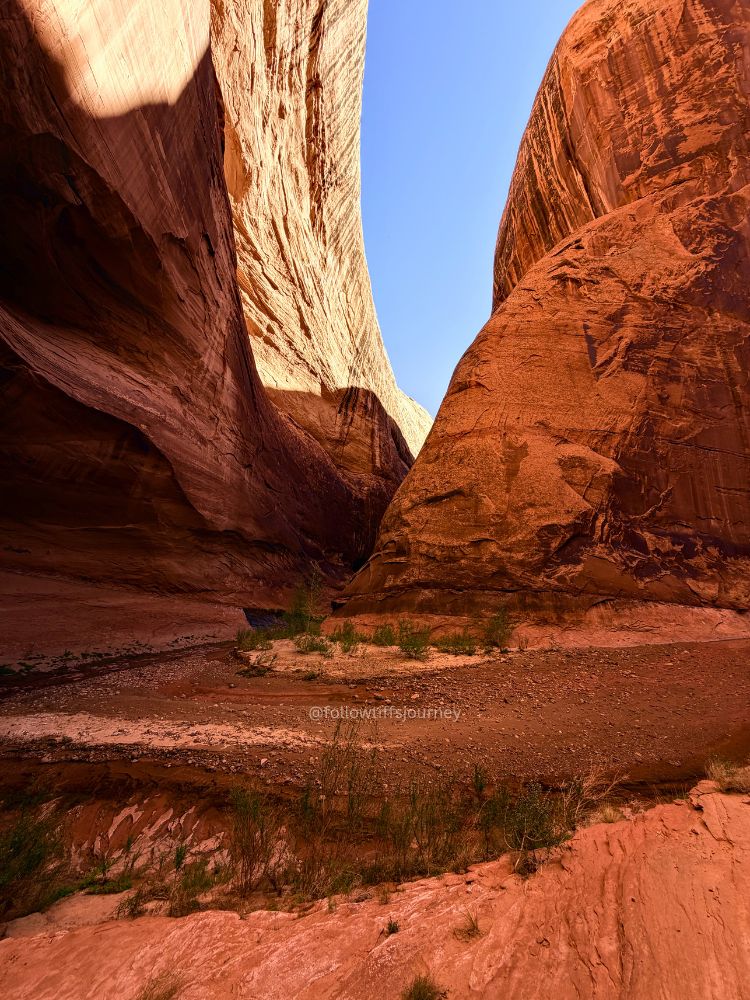
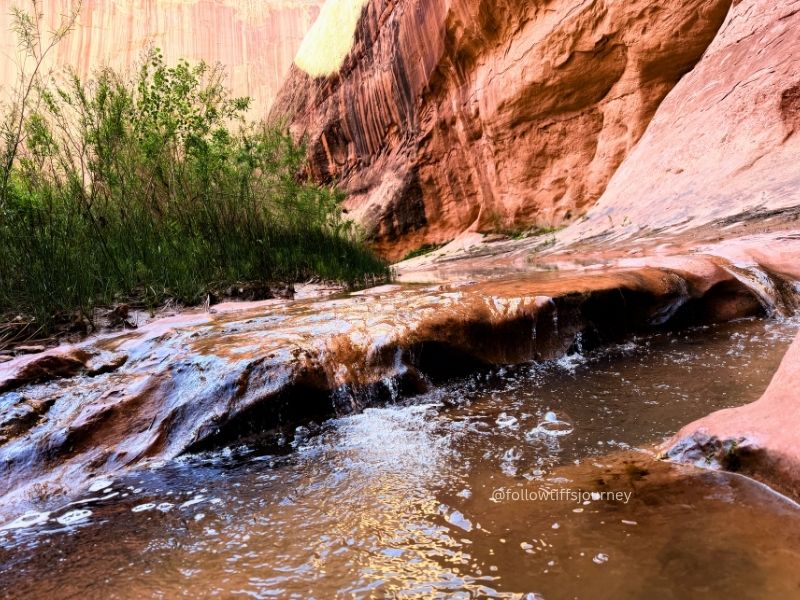
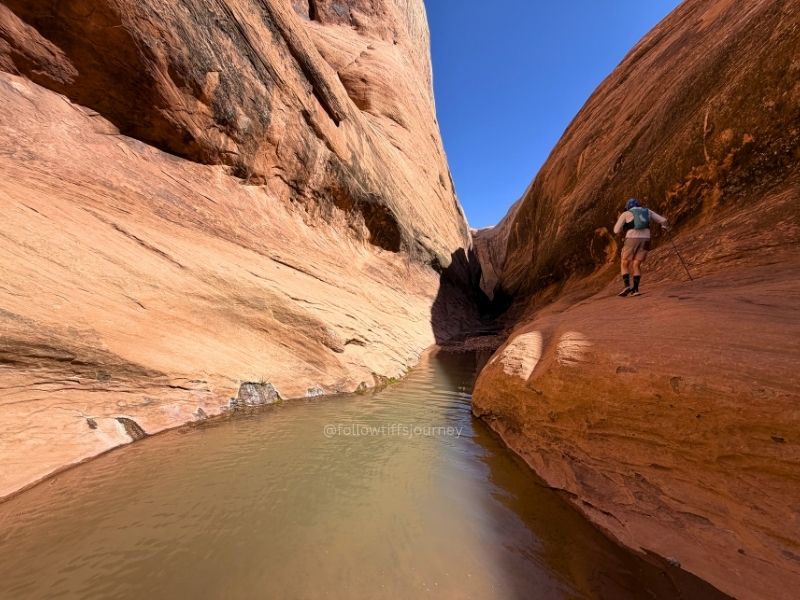
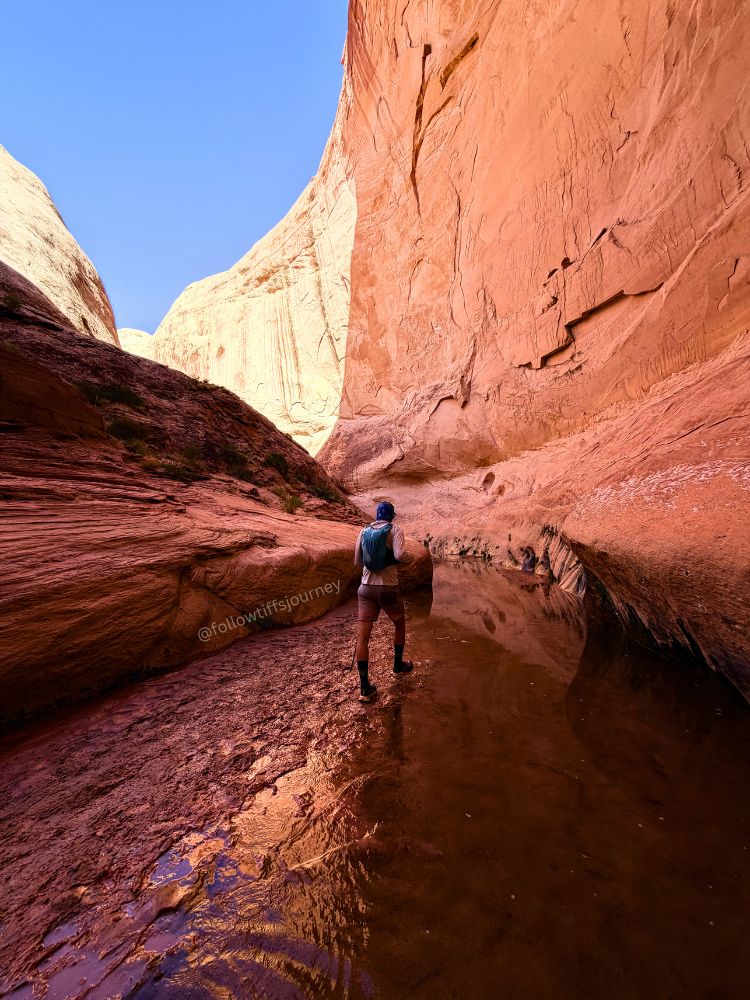
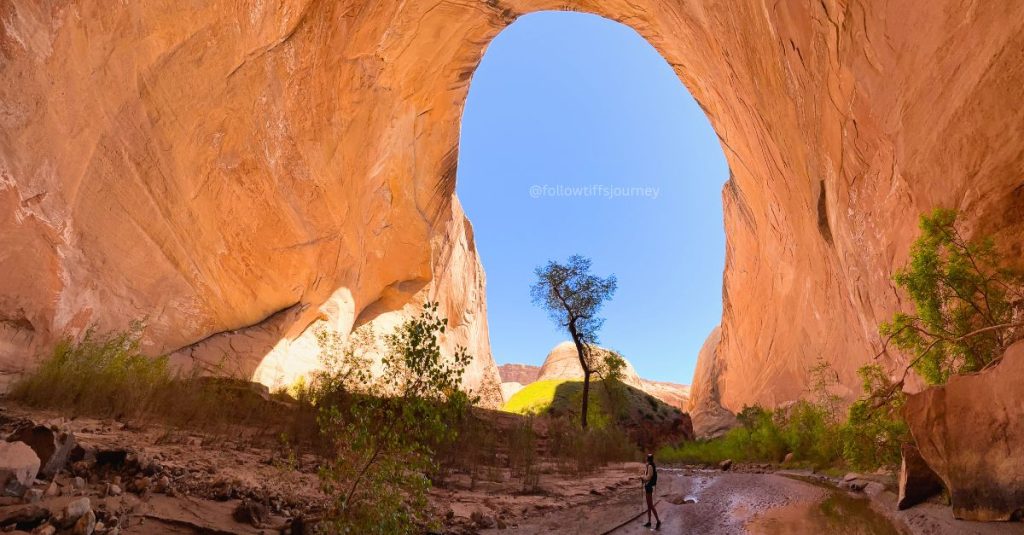
We went upstream through the narrows. This spring morning, the water was frigid cold — but you get used to it. The creek is a little overgrown at this end to start, but after a few feet everything opens up. While the narrows is technically a slot canyon, it’s very wide and you don’t get the claustrophobic feeling you might have with Peekaboo Slot Canyon in Escalante.
We started the Narrows at 9:22 am, took a lot of photos, a snack break in between, and finished back at camp at 12:30 pm. I’ll let you experience the magic of the canyon for yourself — just remember to look up.
We packed up and left camp at 1:30 pm and got back to the car in 2 hours.
What to Expect in the Narrows
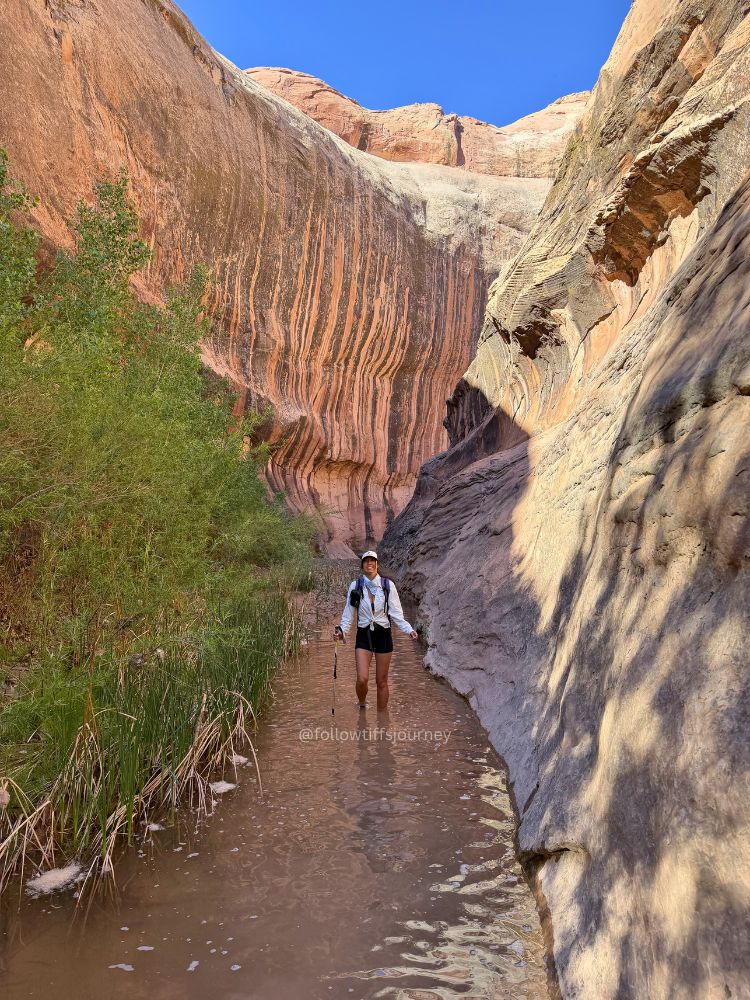
My Gaia tracker clocked 6.18 miles for just the water section — that’s primarily finding the path of least resistance through the canyon. You are going to get wet. That’s not negotiable.
Water depth varies by season and recent precipitation, but plan on anywhere from ankle-to-knee-deep wading for most of it, with a few pools that reach waist depth. A few things I’d flag from my trip:
- The current isn’t fast, but the streambed can be uneven and sandy. Poles aren’t as necessary as in the Zion Narrows, but they don’t hurt.
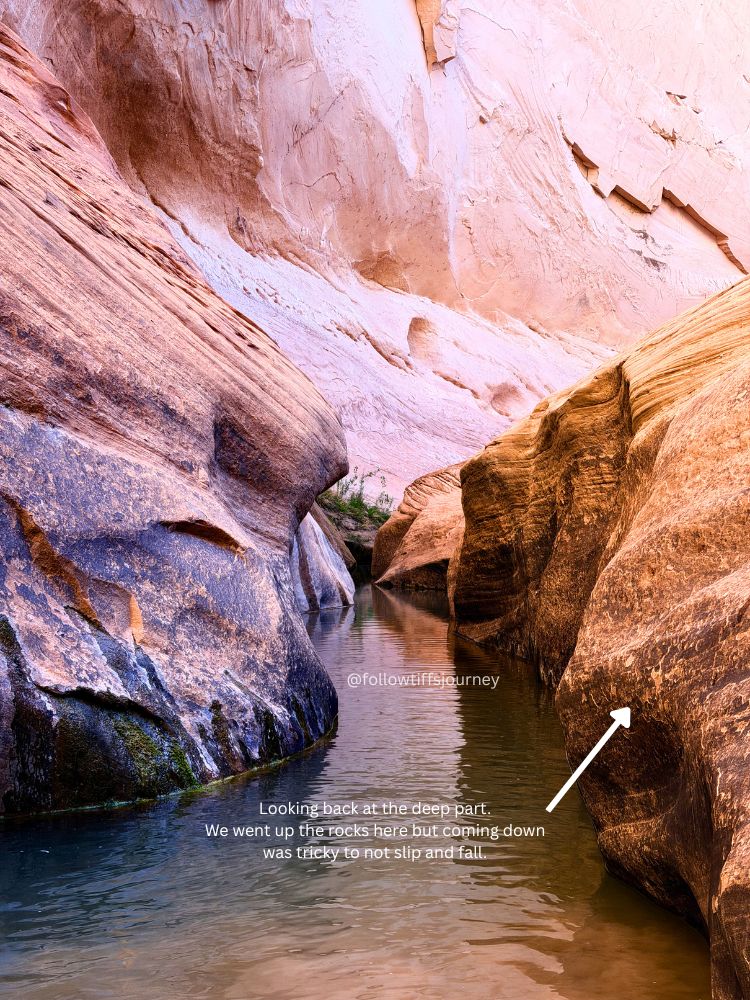
- The water was primarily ankle deep — it does get to waist deep in one section, but we found a way up and around the slanted rocks. Only go around if your shoes grip well and you’re comfortable on slabs, because coming down is tricky and you can really hurt yourself.
- The water is cold in the early morning. Factor that into your gear decisions.
- The lighting in the canyon is incredible. Morning light filtering into the narrows is worth setting an early alarm for. But starting early also means you’re in the shade for a lot of it.
- Water color — mostly clear. Where it looks greener is where it’s deeper.
- Quicksand — there’s a lot of soft sand along the edge of the water where you’ll sink with each step. It wasn’t bad, but don’t linger on it.
The whole loop took us about half a day at a relaxed pace with time to explore, take photos, and poke around side alcoves.

Recommended Itinerary
2-Day Trip (via our route):
- Afternoon of Day 1: Drive to trailhead, hike ~5 miles down the shortcut route to the narrows junction, set up camp
- Morning of Day 2: Hike the narrows loop (start early for the best light), back at camp by noon, pack up and drive out
3-Day Trip (traditional route):
- Day 1: Hike down from the overlook, camp near the narrows mouth
- Day 2: Day pack through the full narrows loop
- Day 3: Break camp and hike back out
The 3-day pace is what most people recommend — it’s a lot of miles and the narrows are worth savoring. That said, if you’re a fast hiker who doesn’t mind a long Day 1, two days is totally doable. If you’re really moving, you could even do it in one day from our trailhead.
One note on timing: we had originally planned to stay a second night, but finished the narrows by noon and had enough daylight left to drive all the way back to Colorado—a hot shower felt so good after this adventure. The bugs and mosquitoes were starting to show up at camp, which made the decision easy. If you’re doing this in late spring, pack bug spray and factor that in.
Pro Tip: Pack wipes for the cleanup after—WaterWipes have been my roadtrip buddy since the beginning.
Water Sources
Bring a filter and carry more water than you think you need. Desert math is different from mountain math.
- Fountain Tanks: About 4.4 miles from the overlook trailhead on the traditional route, on the east side of the gulch. Usually has water year-round but quality varies — filter it. You will not pass this starting from the unmarked trailhead I took.
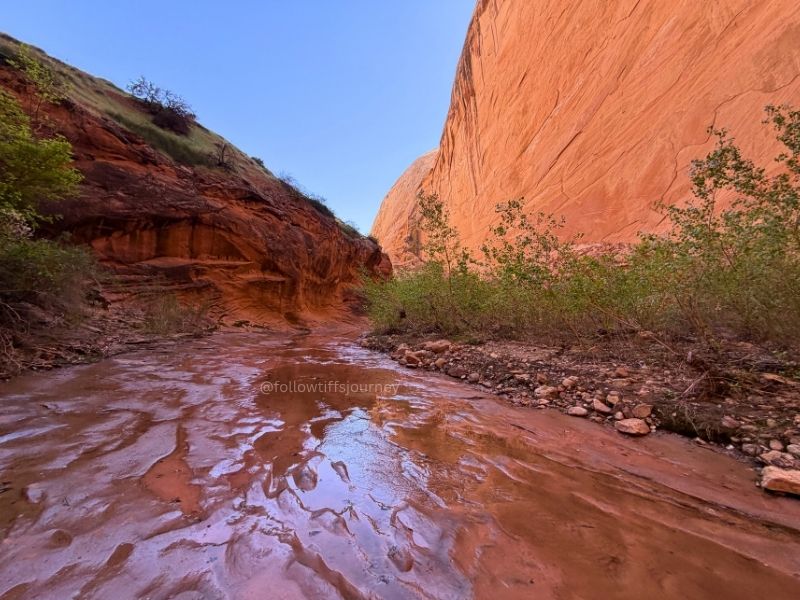
- Halls Creek itself: Once you’re in the drainage, the creek runs seasonally. When it’s flowing, it’s a reliable source. It was dry for most of our hike until the very end — when it’s dry, stay on the east side of the drainage and move efficiently.
- The narrows: You’ll be wading through plenty of water, but don’t drink it unfiltered. Check the NPS site for any cyanobacteria advisories before your trip.
Shop my favorite lightweight water filter [click here]
Best Time to Visit Halls Creek Narrows
- Spring (April–May): Ideal temperatures, higher likelihood of water in the creek. Bugs start picking up in late May.
- Fall (September–October): Equally good. The water may be lower, but temperatures are comfortable and the crowds (such as they are) thin out even further. Late September through mid-October is particularly nice to visit the desert.
- Summer: Very hot. The desert sun is brutal and the approach is exposed. If you go in summer, plan to be in the narrows during the heat of the day and hike the open sections in the morning and evening.
- Winter: The narrows require wading — doing that in near-freezing temperatures is genuinely dangerous. Not recommended.
Booking travel soon?
Please consider using my affiliate links below. It costs nothing additional for you but helps me maintain the ever-increasing costs of running a travel blog:
General travel through Tripadvisor here.
Book your flights here.
Book your accommodations here on Expedia, Booking.com, Hotels.com, and VRBO.
Book your car rentals here.
Book your tours here.
Book your travel insurance here.
Shop my favorite gear here.
What to Pack: Gear for Backpacking Halls Creek Narrows
- Overnight backpack + attachable shoulder pocket phone case (this has been a game changer for convenience)
- Ultralight stuff pack for day hiking the narrows
- Ultralight backpacking tent: I’m a huge fan of Big Agnes Coppur Spur: if you’re sharing a tent and they carry weight 😉 this one has plenty of space for 2
- 3-season sleeping bag: My Katabatic quilt is my favorite lightweight sleeping companion
- 3-season sleeping pad: The NeoAir XLite is perfect for this type of trip
- Pillow: My luxury camp item. Big Agnes pillow blows up in less than 3 breaths and weighs only 1.6 oz
- Backpacking stove
- Hiking poles are ereally helpful for this hike
- Bug Spray: Tongo has been a recent DEET-free fav and it smells good
- Footwear: Quick-draining trail runners are the move. The streambed in the narrows is mostly sandy, not rocky. And skip the waterproof hiking shoes — once your foot fully submerges, the Gore-Tex works against you and makes it much harder to dry out.
- Navigation: Download your route to Gaia GPS before you leave home. No cell service, cairns disappear after floods, and the trail braids in multiple places.
- Garmin InReach Mini: emergency SOS… just in case
- Packable lightweight towel
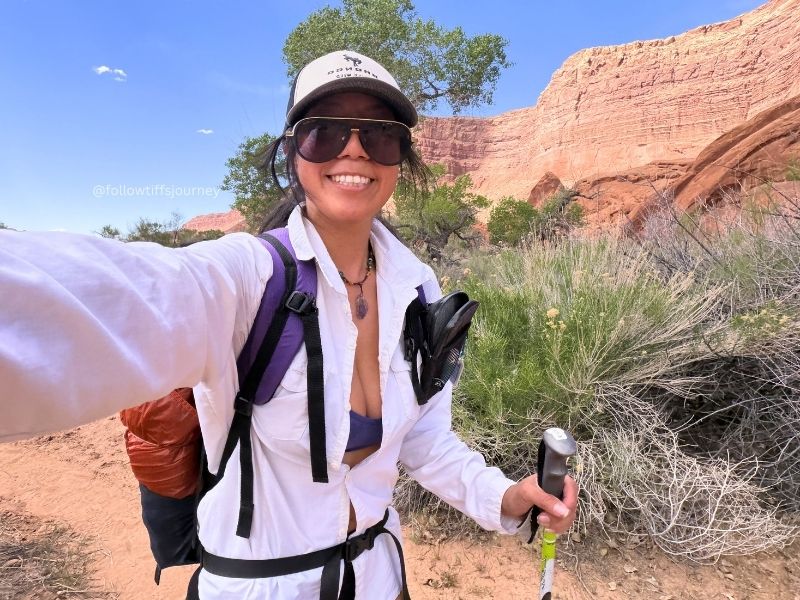
- My outfit/ layers:
- Craghoppers sun and bug repellant shirt (click here for 15% off)
- Fjallraven abisko tights—my favorite for scrambling
- Merino wool shorts for the water section (click here for 15% off)
- Branwyn merino wool bralette—perfect for a sweaty hike. Read my review here.
- Hollow alpaca wool socks
- I also packed a windbreaker, midlayer fleece, and light puffy… and didn’t wear any of it.
For a full packing list, check out Tiff’s Personal Backpacking List and my Ultralight Backpacking Guide if you want to keep your pack light on a trip like this.
Questions about gear and packing? Book a call with me here.
Camping at Halls Creek Narrows
Car camping at the trailhead is not allowed within the national park boundaries, though the access road is BLM land and you may find dispersed camping options out there. All overnight camping within the park requires a free backcountry permit.
The best campsites on the hike are near the cottonwood groves as you approach the narrows entrance — they offer a little shade, proximity to the creek for water, and a perfect launching point for the narrows loop the next morning. We camped right at the narrows junction on the rocks, and it was a great spot.
Leave no trace principles are especially important here. The canyon sees light traffic but the ecosystem is fragile. Pack out everything, camp on durable surfaces, and follow NPS backcountry guidelines.
What Makes Halls Creek Narrows Different from Other Utah Slot Canyons
Most popular slot canyons in Utah — Antelope Canyon, Peek-a-Boo, even the Zion Narrows — come with crowds, permits that sell out months in advance, or guided-tour requirements. Halls Creek is the opposite of all that.
You earn this place. The rough drive, the long approach, the route-finding — all of it filters out the casual visitor. What you get in return is one of the most dramatic canyon environments in the Southwest, almost entirely to yourself.
If you’ve done Coyote Gulch and are looking for something with a similar “middle of nowhere” feel — deep canyon walls that really make you realize just how small we are in this beautiful world — but with more technical scrambling and wading, Halls Creek is a natural next step. And if you love the canyon country around Hanksville, places like Leprechaun Canyon and Moonscape Overlook are just down the road — this whole region is worth a dedicated road trip.
I’ve spent countless days over the past decade exploring Utah’s desert and I’d love to help you plan your next adventure. Learn more about my custom trip itinerary service here.
FAQs: Halls Creek Narrows
Do you need a permit for Halls Creek Narrows?
Any overnight trip in Capitol Reef NP requires a free backcountry permit. Day hikes on the shortcut route don’t require one. Permits are available at the visitor center.
Can you day hike Halls Creek Narrows?
It’s possible using this shortcut route, but it’s a long and demanding day with technical scrambling — not for the average hiker. Most people do it as an overnight or 2–3 day backpacking trip.
What shoes should I wear in Halls Creek Narrows?
Quick-draining trail runners are the best choice. Avoid waterproof hiking shoes — once your foot submerges, the Gore-Tex traps water and makes it much harder to dry out.
How hard is the Halls Creek Narrows hike?
It’s rated moderate-to-strenuous and best suited to intermediate or advanced hikers. The route is minimally marked, requires good navigation skills, involves wading through cold water, and the traditional approach covers roughly 20 miles total.
Are there bugs at Halls Creek Narrows?
Late spring and early summer can bring mosquitoes near the creek. Bring bug spray if you’re going April–May.
Is Halls Creek Narrows crowded?
No — this is one of the least-visited slot canyons in Utah. We passed only a handful of other groups over our entire trip.
Final Thoughts: Halls Creek in Capitol Reef National Park
Halls Creek Narrows checked every box: route-finding, scrambling, a stunning canyon, and zero crowds. The logistics are real — the drive is long, the permit is required, the vehicle needs to be AWD/4WD with high clearance — but none of it is complicated. It just takes a little planning.
If this has been on your radar, stop waiting. It was on mine for years, and I’m only kicking myself for not going sooner — and already planning a return trip in my head.
Have questions about the route, the narrows conditions, or gear? Book a call with me here.
Heading to Capitol Reef and want to explore more of the area? Check out my full Southwest USA adventures page for nearby hikes, slot canyons, and hidden gems across Utah, Arizona, and more.

Tiff, the owner and author of Follow Tiff’s Journey, is a California/ Colorado-based adventurer and outdoor connoisseur who divides her heart between the Eastern Sierra Mountains and the Colorado Rocky Mountains. Despite her fear of heights, she’s become a seasoned mountaineer, ultralight hiking and backcountry camping enthusiast, expert road trip planner, and a fervent explorer of alpine lakes, natural hot springs, and sandstone canyons.
With 10 years of experience exploring the outdoors, her blog is your go-to source for all things wilderness, offering invaluable insights and pro tips, essential gear recommendations, and awe-inspiring stories from her adventures.
Join Tiff on her quest to share the wonders of nature and inspire others to follow their own path in the great outdoors.